
The play is finished. Yeah... and the pluderhose aren't. The boys
did wear them though - both pluderhosen were stapled and safety-pinned together. ~hides face in shame~ No, you couldn't tell that they weren't finished (well, I definitely could, but nobody else knew), and their pants didn't fall off (I was mortally afraid that Justin's would just fall to pieces during his fight scene!).

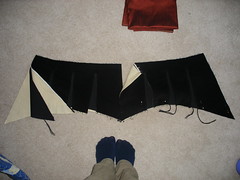
So I'm going to just keep blogging my progress, as I actually sew the pluderhose together properly! On the left is a picture of the Erik Sture pluderhose 'waist'. It's attached at the front (you can see the fly folded back). On the right side of the waist, I pinned up the panes so that they would sort of pouch out, like the finished product. On the left side you can sort of see that the panes are about a half inch longer than the base. You can also see all the different layers of fabric - the linen lining, black canvas base, and the linen lining to the top layer. Make sense? It took
forever for me to figure out exactly how to do that!!

About a week ago I went to the Bloomfield's to help Tom's mother sew a dress, and while I was there I pinned the pluderhose waist onto Tom to get an idea of what it would look like. It's a good thing I did this, because it turned out that Tom wasn't fat enough (I alternate between calling him too skinny or too fat - he's really just a thin plaid line when he turns sidways) for the waist as it was, and I had to fix that! Of course, when I was there I could hardly run away home again before stuffing
something under the panes to see what the waist poufs would look like. The waist poufs are the best part of these pluderhosen, dontcha know. I had brought along some long strips of the taffeta we picked for this costume, and I just threaded those through. I ended up doing this for the play, too, and pinning Tom in the process, but he forgave me (it's perfectly dreadful when you're frantically pinning somebody into their costume as the play starts and they do this sort of jump-an-yelp thing, and you know that you've stabbed them) and all's well...
The pink fabric hanging down the back of his leg is the extra from the waist poufs - my strip of fabric was too long so I just knotted it and let it hang.


 So I'm going to just keep blogging my progress, as I actually sew the pluderhose together properly! On the left is a picture of the Erik Sture pluderhose 'waist'. It's attached at the front (you can see the fly folded back). On the right side of the waist, I pinned up the panes so that they would sort of pouch out, like the finished product. On the left side you can sort of see that the panes are about a half inch longer than the base. You can also see all the different layers of fabric - the linen lining, black canvas base, and the linen lining to the top layer. Make sense? It took forever for me to figure out exactly how to do that!!
 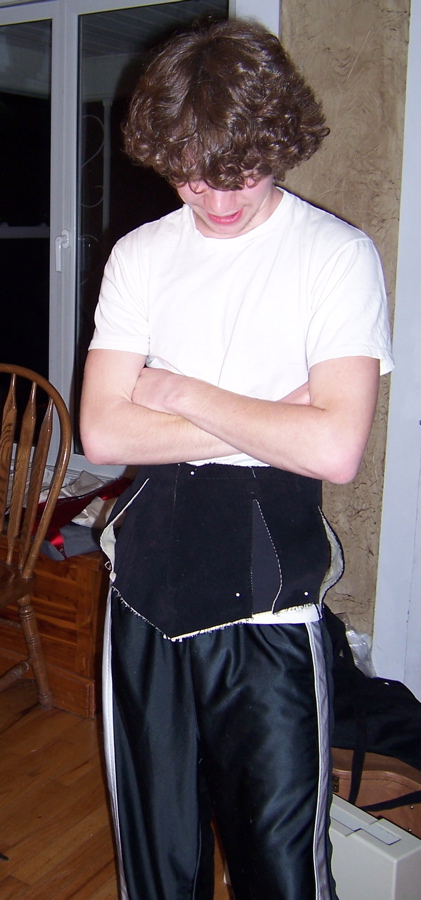 About a week ago I went to the Bloomfield's to help Tom's mother sew a dress, and while I was there I pinned the pluderhose waist onto Tom to get an idea of what it would look like. It's a good thing I did this, because it turned out that Tom wasn't fat enough (I alternate between calling him too skinny or too fat - he's really just a thin plaid line when he turns sidways) for the waist as it was, and I had to fix that! Of course, when I was there I could hardly run away home again before stuffing something under the panes to see what the waist poufs would look like. The waist poufs are the best part of these pluderhosen, dontcha know. I had brought along some long strips of the taffeta we picked for this costume, and I just threaded those through. I ended up doing this for the play, too, and pinning Tom in the process, but he forgave me (it's perfectly dreadful when you're frantically pinning somebody into their costume as the play starts and they do this sort of jump-an-yelp thing, and you know that you've stabbed them) and all's well...

 The only thing I'm that bugs me about it is that the waist seams at center front don't match, because the waist slants down a little. Hmm...


